Introduction#
Objectifs#
The main goal of the project is to create a subnetwork with all network components required, including a manageable PoE+ switch and a VLAN compatible Access Point so that IoT devices, and main network are kept separated. It also allows me to gain experience by configuring a router, a switch and an access point.
Component Presentation#
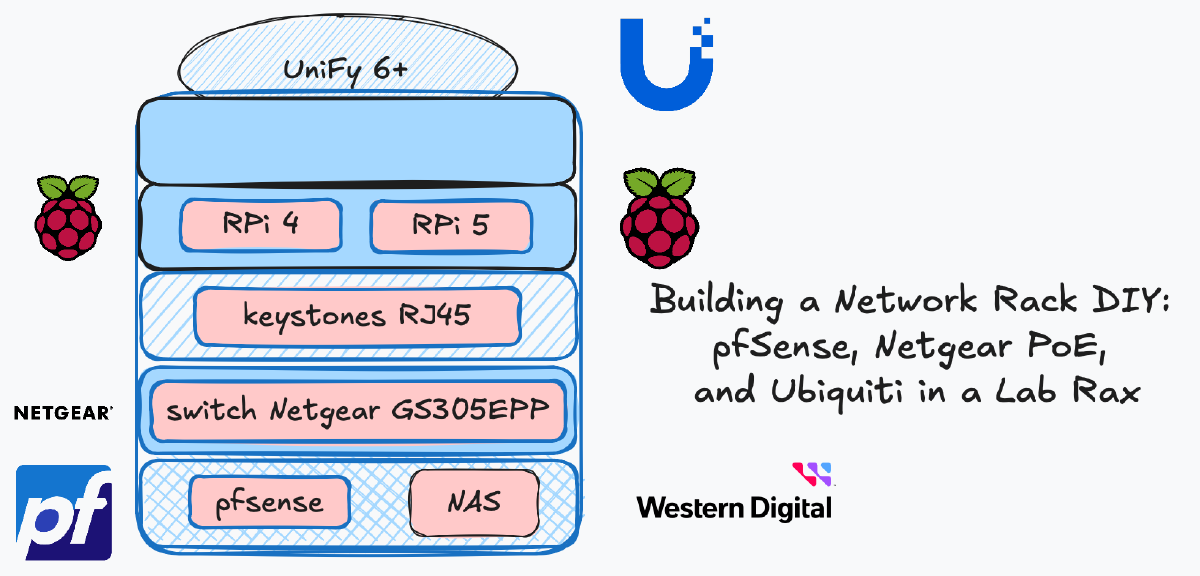
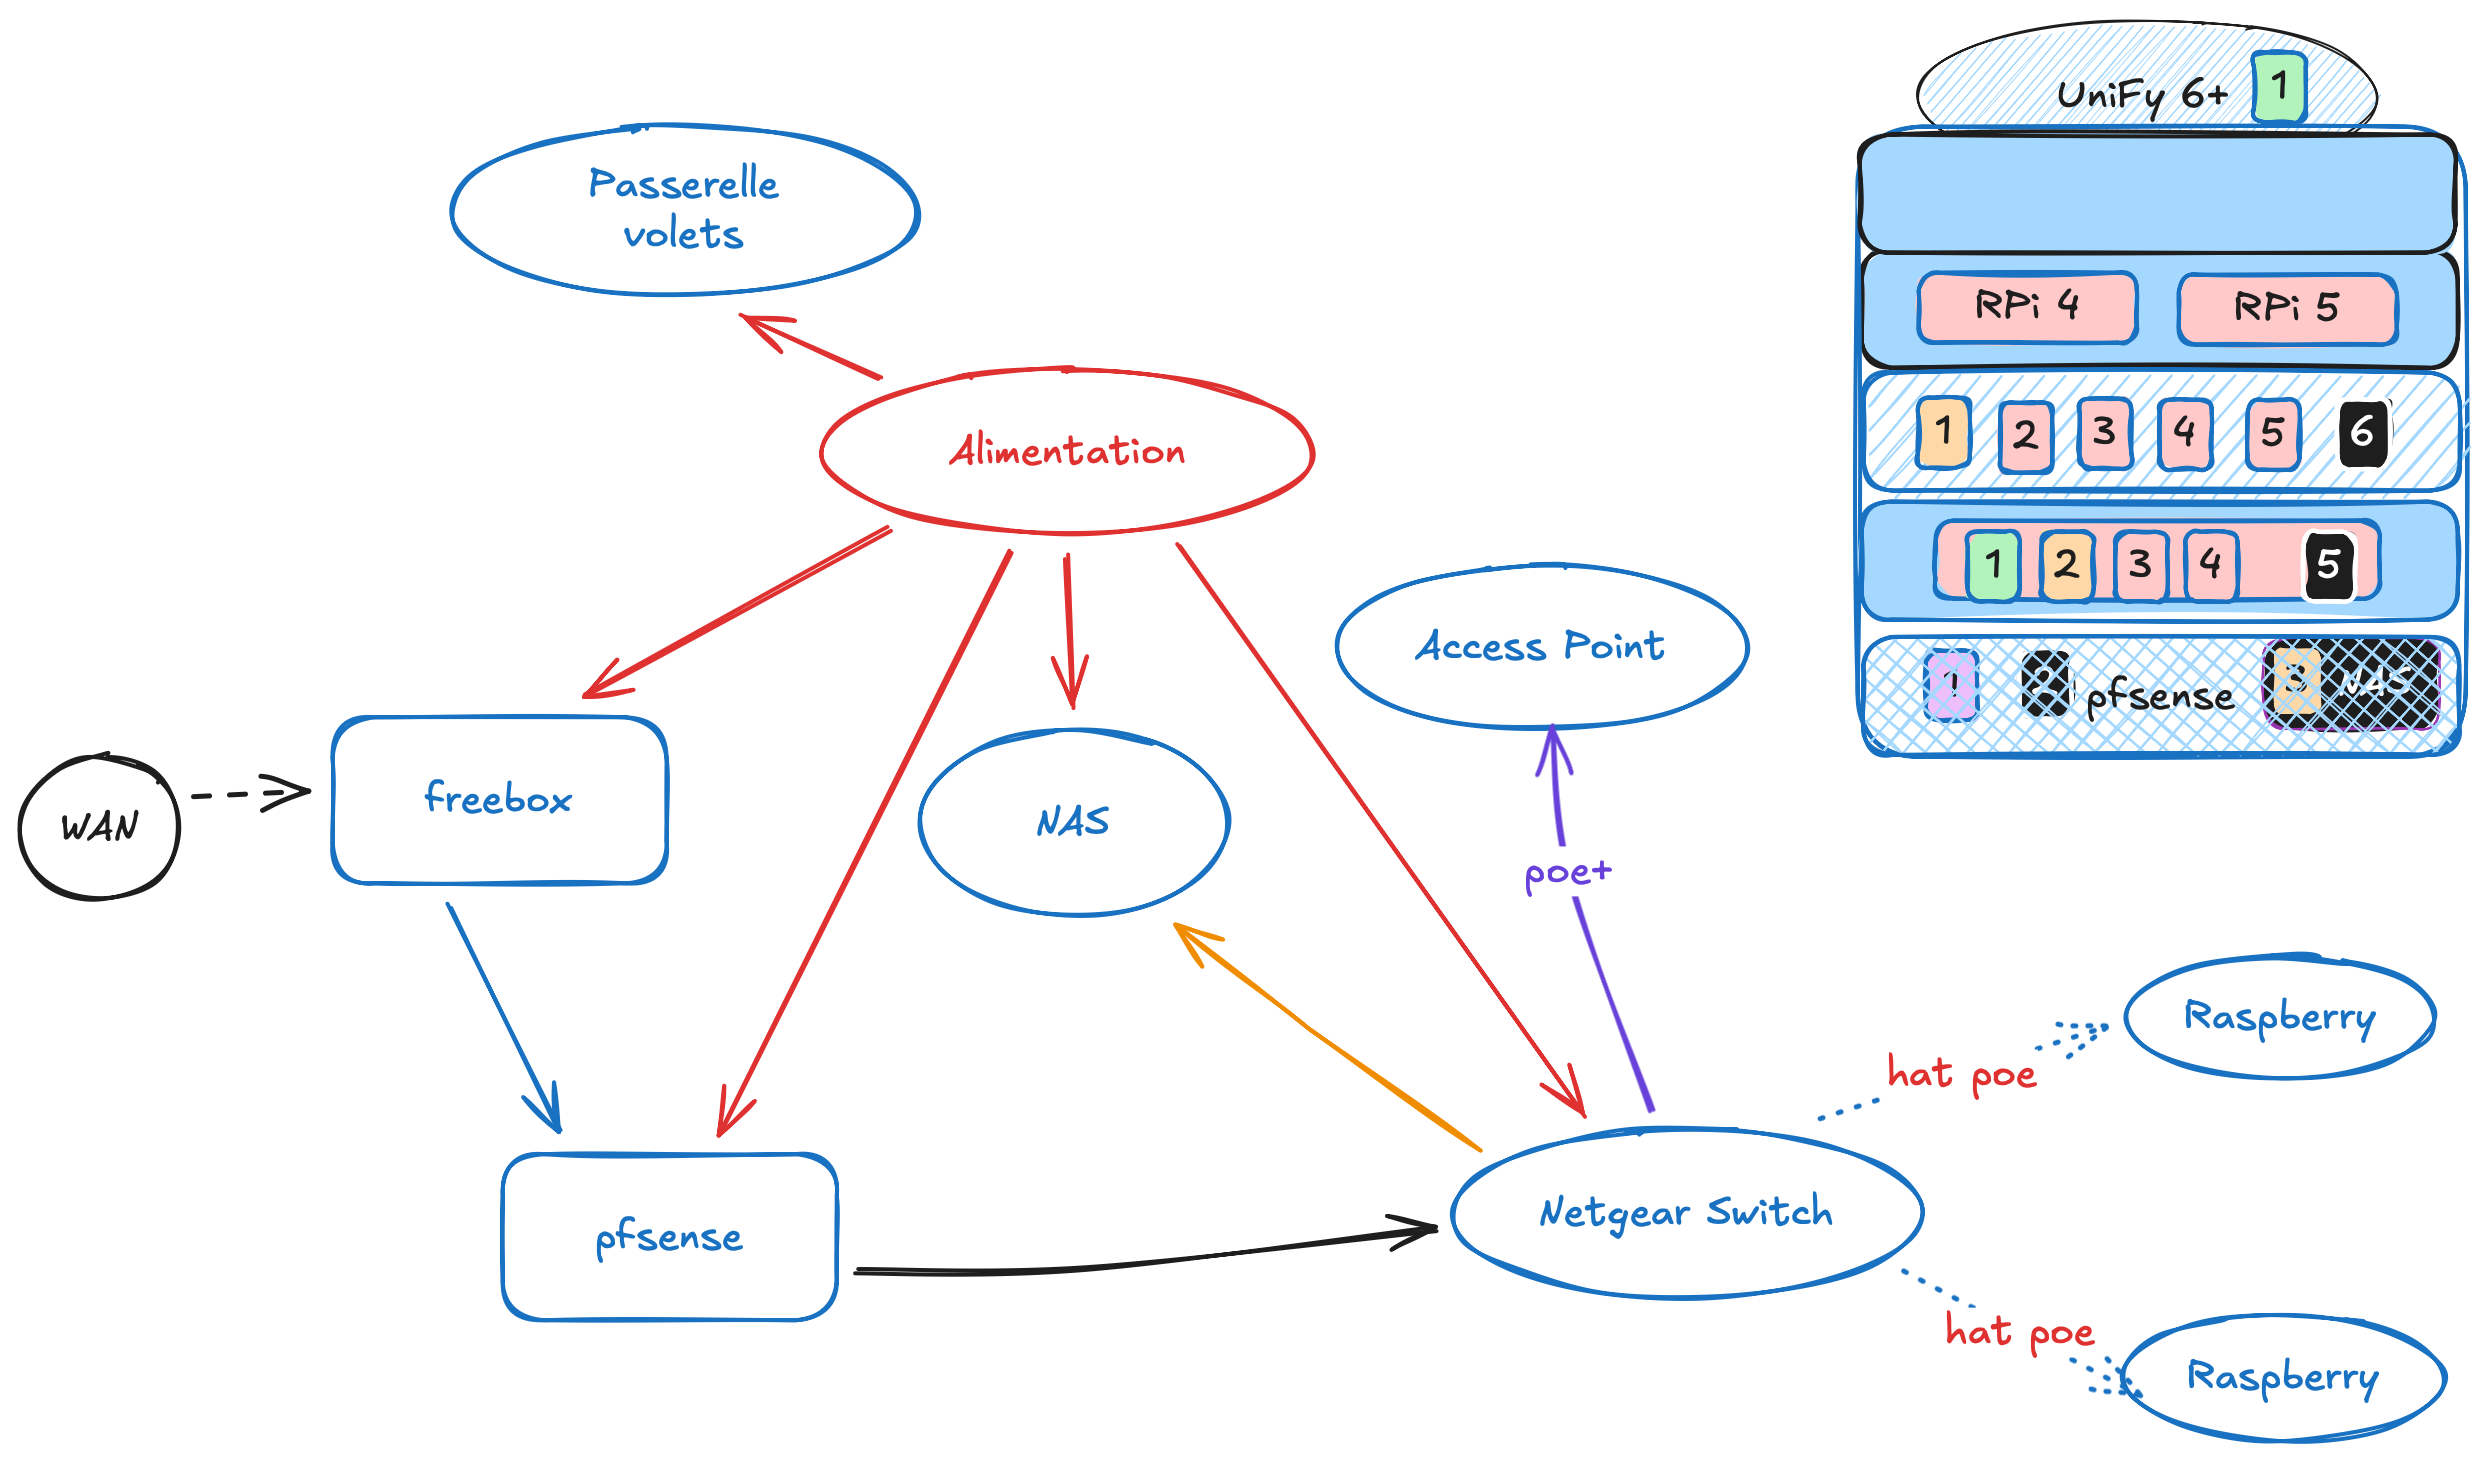
A diagram representing :
- Which devices to include inside the lab rax 5U
- The needs in power (PoE or standard alimentation)
- Locations of the devices
- Connection betwteen devices
Inventary#
Tools#
- Soldering Iron
- 3D printer (with Lab Rax Model)
Equipements#
- Router : pfsense
- Switch Netgear GS305EPP
- Access Point : Ubiquiti UniFi 6+
Pfsense router (192.168.100.1)#
The pfsense image can be retrieved on the official website, and a VM can be created via the proxmox interface.
- Access the interface
- Create a password
- Create interfaces
- LAN (192.168.1.0/24) : the local network
- PLAN (192.168.100.0/24) : the private local network
- Add a DHCP server on the PLAN
- Add a firewall rule so that you can access pfsense interface via LAN
Netgear switch (192.168.100.2)#
- Connect the switch to your PC and the pfSense router.
- Change your PC’s IP address to add it inside the
192.168.0.0/24subnet to access the switch interface (except for192.168.0.239being the switch IP address). - Access the switch interface (http://192.168.0.239) and update the switch’s IP address to integrate it into the 192.168.100.0/24 network.
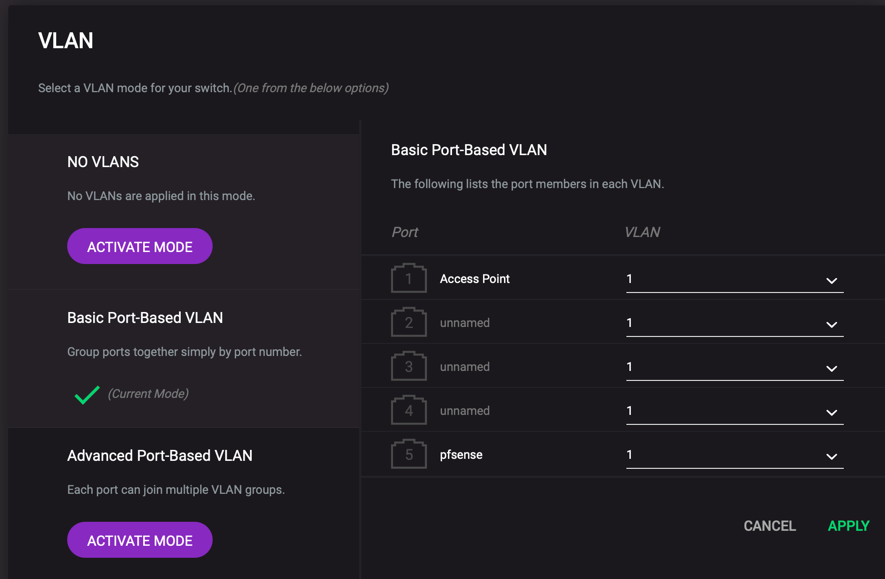
- Configure VLANs via the web interface, keep it simple to start with.
Access Point Ubiquiti UniFi 6+ (192.168.100.3)#
To configure the unifi 6+ AP, we will need the UniFi Controller, either Local or Cloud. Here, I’ll be using the local installation in a docker container :
services:
  unifi-network-application:
    image: linuxserver/unifi-network-application:latest
    container_name: unifi-network-application
    environment:
      - PUID=1000
      - PGID=1000
      - TZ=Europe/Paris
      - MONGO_HOST=unifi-db
      - MONGO_PORT=27017
      - MONGO_USER=unifi
      - MONGO_PASS=UniFi123$
      - MONGO_AUTHSOURCE=admin
      - MONGO_DBNAME=unifi
    networks:
      unifi-bridge:
      unifi-macvlan:
        ipv4_address: 192.168.100.4
    volumes:
      - ./data:/config
    ports:
      - 8442:8443
      - 3478:3478/udp
      - 10001:10001/udp
      - 8080:8080
    restart: unless-stopped

  mongodb:
    image: mongo:4.4.19
    container_name: unifi-db
    networks:
      - unifi-bridge
    volumes:
      - ./db:/data/db
      - ./init-mongo.js:/docker-entrypoint-initdb.d/init-mongo.js:ro
    restart: always

networks:
  unifi-bridge:
    driver: bridge
  unifi-macvlan:
    driver: macvlan
    driver_opts:
      parent: eth0
    ipam:
      config:
        - subnet: 192.168.100.0/24
          gateway: 192.168.100.1
- Deploy the controller
The macvlan network allows the controller to have an IP address in the same subnet as the AP (you could also use
network_mode: host)
- Access the controller interface (http://192.168.100.4:8443) and create an account
- The AP is detected by the Controller, and we can “Adopt” the AP via the Controller Interface
The AP is automaticaly detected by the controller, else check the controlleur IP address on the interface You can ssh to the AP, if necessary, to check out the logs :
ssh ubnt@IP_AP (password: ubnt)
cat /var/log/messages
- Configure a SSID
- Add a firewall rule if necessary
- Finally : create a backup via the interface
Conclusion#
Building this 3D-printed network rack was fun and challenging, but this isn’t over, it’s only the beginning. Next we’ll dive into Wi-Fi optimization, advanced VLAN configuration and PoE management.